Showing posts with label Elegant Edges. Show all posts

Friday, June 3, 2011

Congratulations Katie!

Here's the graduation card I made for Susan's wonderful, smart, and talented daughter, Katie. She graduated from high school this past Sunday, with like a million honors to boot! I don't think Susan could be any prouder!
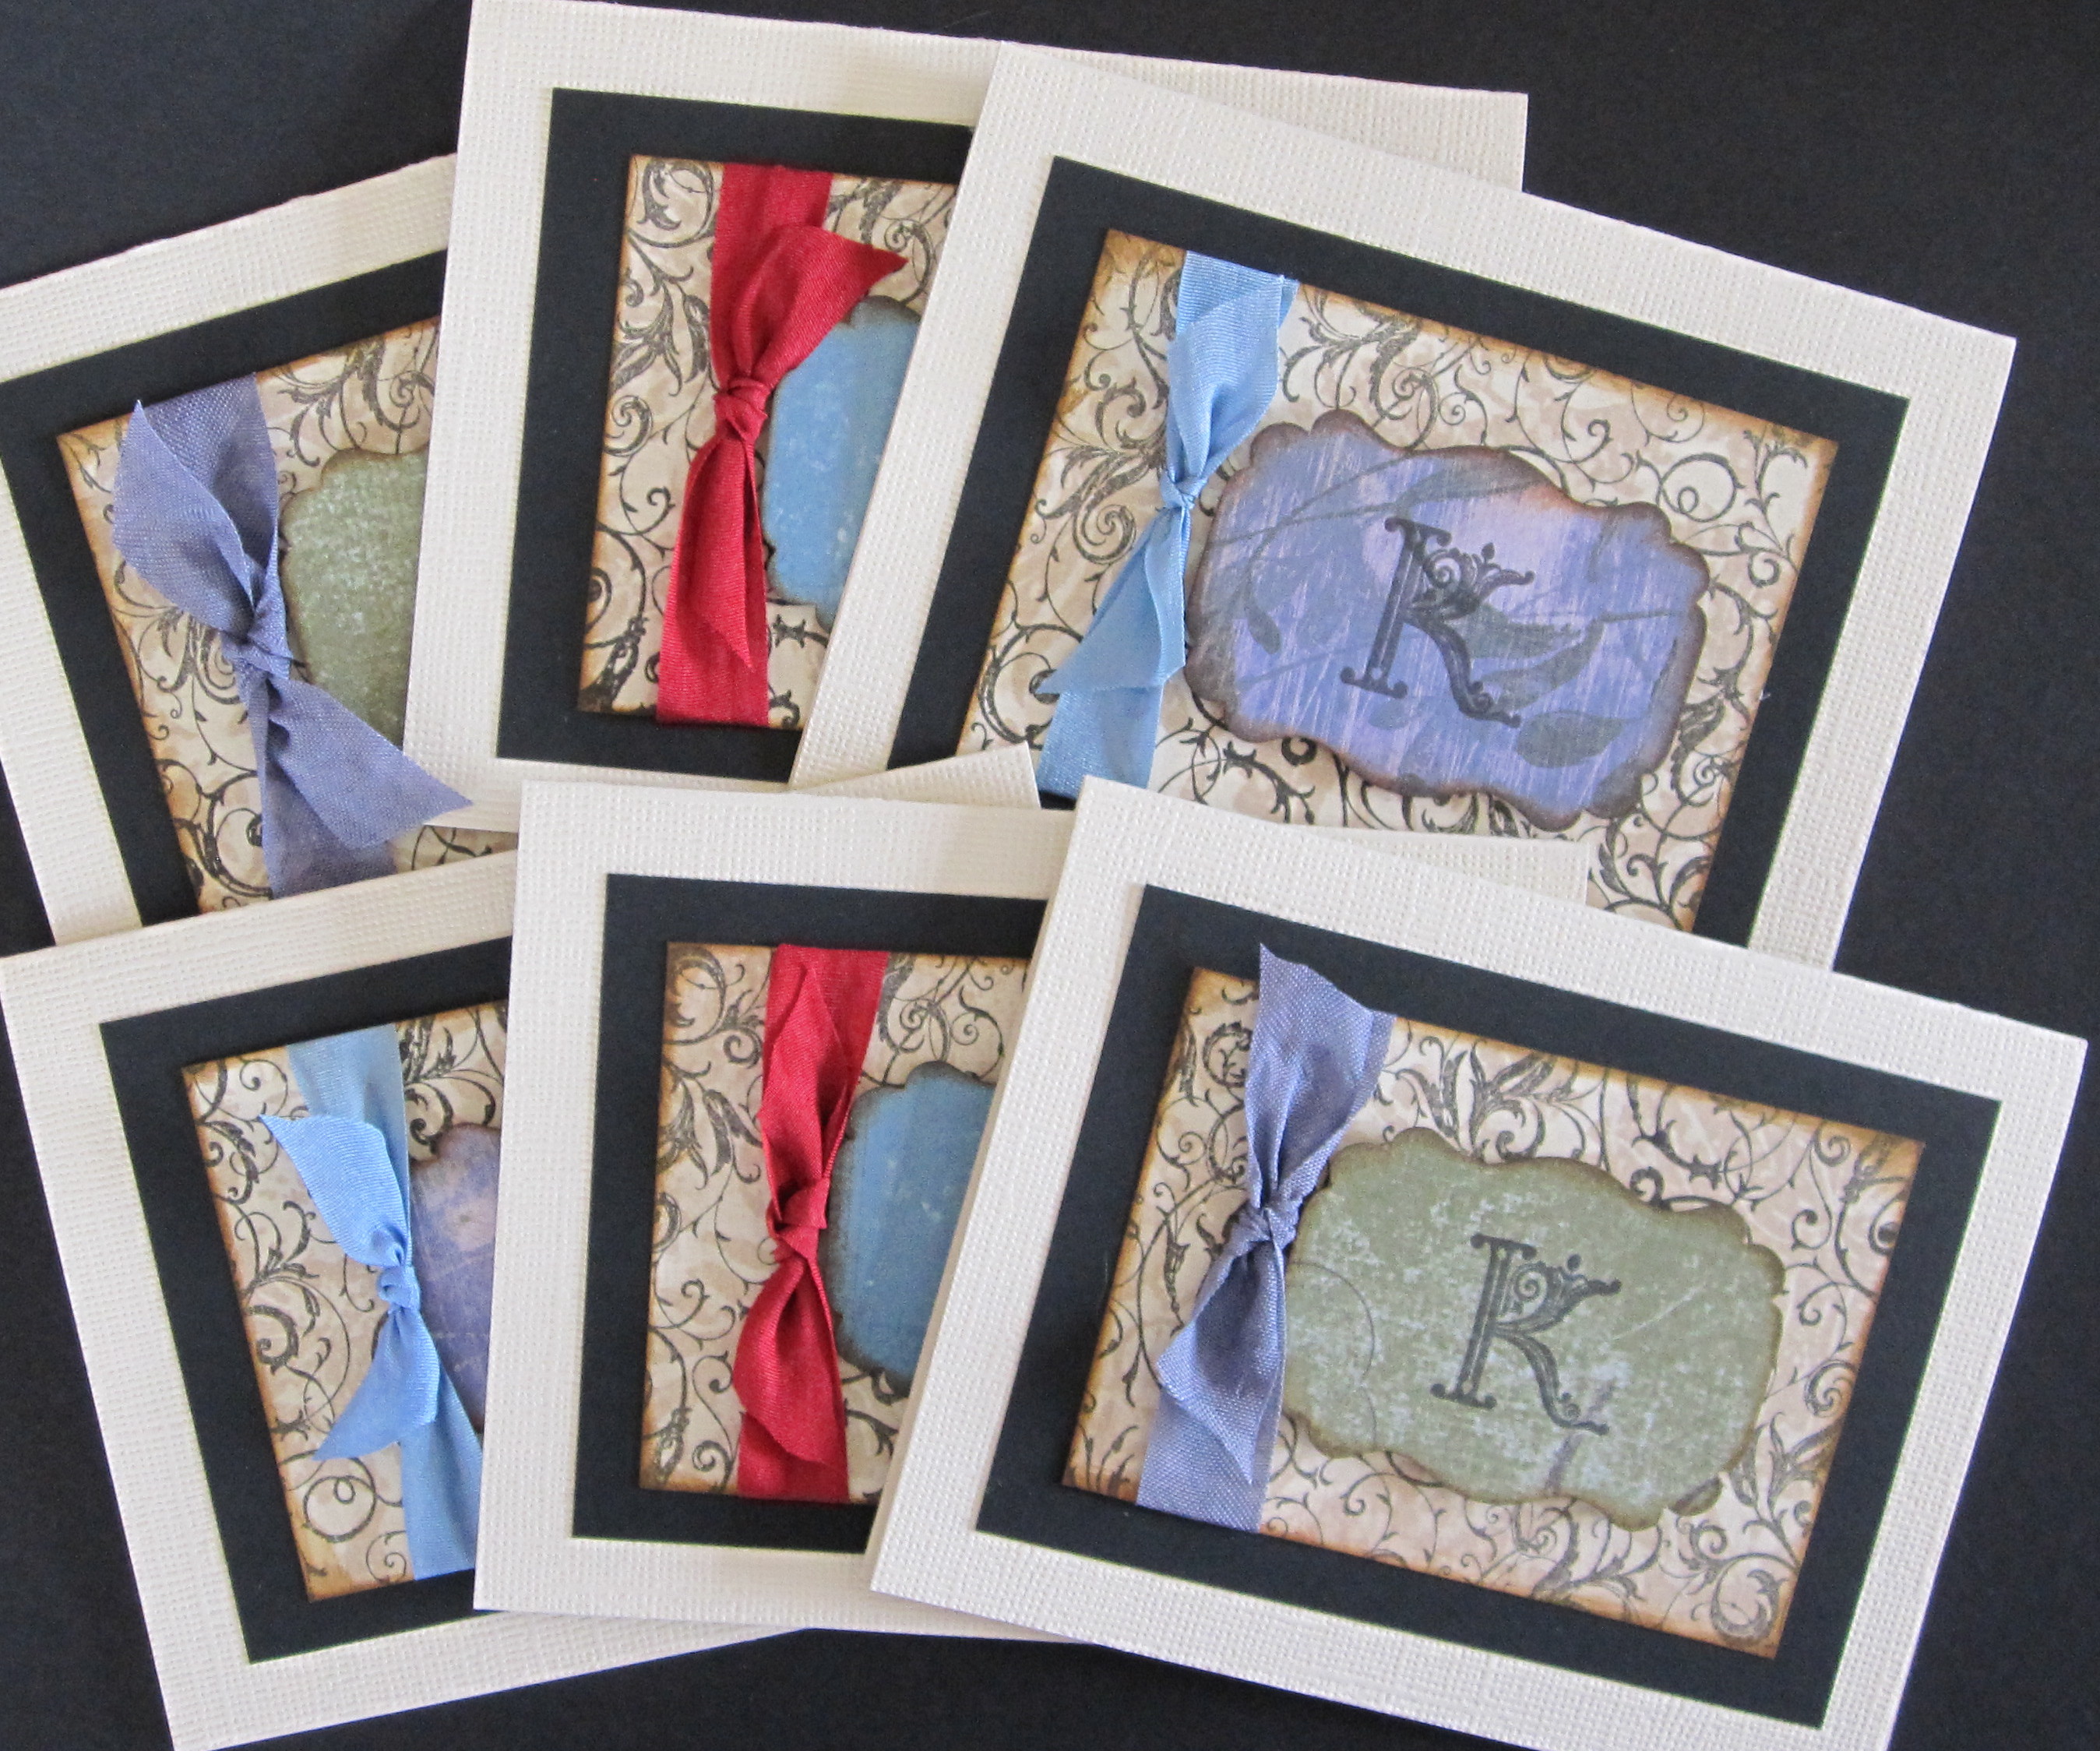
All layers on this card (except the black of course) were cut with my lovley pearlescent Hobby Lobby paper then dyed by me. No regular paper would do for Katie-Miss Artist! Card base is from Elegant Edges and the letter K is brought to you by Winter Woodland. (Yes, I'm being feisty right now, it's been a looooong week!)

Here is a set of note cards I made dear Katie as well. My dear sweet daughter who is friends with Katie approved of all design and color choices. It was nice to have her input because she doesn't craft with me very often. The little tag is a punch I picked up a couple weeks ago at JoAnn's. It's by E K Success and it's slim profile which makes it easy to store. I love the thing! This time the letter K is brought to you by some fancy clear alphabet set Susan and I picked up a few years ago at a scrapping convention. The background stamp (on the tan paper) was a foam backed re-positional stamp from Hobby Lobby. I'm trying to expand my horizons here and try "new" things......

Hope you all have a fantastic weekend!

Friday, May 20, 2011

A "Cool" Graduation Card

Happy Friday everyone! Here is a graduation card I made for my nephew. I was hesitant to make him one at first because I sure didn't want it to be cute in any way. I wanted to go a little edgy on this one because my nephew has his own band and plays the drums, among other things.
 I found this diamond shape on Elegant Edges-itsn't it cool? I matted it on mirror finish silver paper to make it pop. I decided instead of the usual graduation card I would do Alex's monogram instead, and I love the way it looks!. The monogram was cut using light grey card stock and it was shadowed with black. I pop dotted both the blue diamond shape and the monogram.
Inside is pretty simple, more of the diamond shape, this time without the diamond cut outs in the center, and a stamp. I also made another non traditional graduation card at the same time, but I can't show you yet because it is for Susan's daughter....  :)

Hope you all have a blessed weekend!

Sunday, May 15, 2011

Vintage-Red- Bling = ME!

Last weekend I participated in National Scrapbook Day challenges over at Scrapbook.com. I had so much fun, but I've got to say, I don't like the pressure to create in a set amount of time. :)  This mini book was a week long challenge we had to create all about ourselves. It had to be at least 5 pages and could be in any size or format we wanted. Of course I knew I had to go with my beloved color RED! I pulled out all my favorite papers and cut away! The hardest part for me was trying to find pictures I wanted to use in my book. I knew I wanted it to be about my happy place, but for the life of me I couldn't find decent pictures to use of my family and friends-I got very frustrated for sure. Finally on Monday evening I decided to go with vintage images I have gathered from the web-that's when it all came together for me.
Red roses, more red roses, ribbon, lace, buttons, and awesome paper-can't get better than this!

 To know me is to know I adore kitties and chocolate and don't think I could face like without either one! All the images I used are from Vintage Resources and The Graphics Fairy. I actually have this kitty print on a tin sign hanging in my home.

I love the ballet, even though I don't talk about it often. My favorite ever is of course the Nutcracker, but not just any one, I love the one The Pacific Northwest Ballet does-it's amazing!  And who would I be if I didn't craft constantly? Kinda hard to find a vintage image of scrapbooking....  The red ribbon around the ballerina is more seam binding I colored and pleated myself.

Roses are my all time fav! As for the beach, I wish I could live there (a warm one mind you) my whole life! Nothing relaxes me more than the sound of the ocean and the feel of sand on my feet!

 Ok, so who doesn't love having lunch and hanging out with their girlfriends-I know I do! Of course I HAD to add lots of bling to this page. Yes, I know I left out the kids, honestly it's because I couldn't find an image that represented them. This red embossed paper is part of a core'dinations pack from Jenni Bowlin Studio-it is so much fun! All the little tags were made on made on my computer, printed out, cut and inked, easy as that!
Finally, the back cover. I decided to go with this beautiful red flocked paper, it needs nothing else!

So there ya have it, a peek into me.....so what makes you happy???

Thursday, May 12, 2011

Glittery Gift Card Purse

I made this sparkly purse to go with the wedding shower card I made a week or so ago. Because the Bride just loves glitter I just had to make the purse out of my Core'dinations glitter card stock. I used the Tags, Bags, Boxes and more cart. I cut the flower embelishment from my favoirte white shimmer paper again and glittered it as well.  This cut was from Elegant Edges. This little purse was so fun to make and took no time at all.
Becky's going to get some silk rose petals and put them in the purse with her gift card...what a great idea!

I had so much fun making this set, I can't wait to hear what the Bride thought of them!

I also want to say Happy Birthday to my dear friend Missy!!!

Have a Blessed Day!!!


Sunday, May 8, 2011

Happy Mother's Day!

I hope all you wonderful mommies are having a delightful day! I wanted to share the Mother's Day card I made for my sweet mom... She loves purple, flowers and anything pretty. The fern on this cut brings me back to being a kid, she always had them.
 The base of the card and the eyelet layer were cut with Elegant Edges. The wagon, flowers and other images are from Kate's ABC. Once again I HAD to cut the flowers, and butterfly from an old book-just love how that turns out! The flower pots and fern were cut with that wonderful penalized paper from Hobby Lobby. Even after you color it (I used my alcohol inks) the shimmer is still there, it's so pretty! The wagon is topped off with some vintage seam binding I dyed as well.
Here's the inside of the card,once again more hand dyed book flowers and seam binding. I love how cute and ruffly the seam binding is when it's gathered.


Have a very very blessed and restful Mother's Day!

Monday, May 2, 2011

My Paper Lace (not the cartridge)

Becky asked me to make a wedding shower card for a friend. Apparently the bride LOVES glitter, shoes and dark blue. I got it in my head to make a lace dress with paper.  I really wanted to make the dress out of fabric lace but I know I can't cut that with my Cricut, so my mind started racing. ( I don't have any of the paper lace cartridges either.)  I took the dress from Nifty Fifties and laid it on top of the "Lace Doily" cut from Cindy Loo (pg. 70,) using my Gypsy of course. I didn't weld anything, just moved the dress cut around on the doily cut until it looked right to me. I cut the "lace" with some beautiful shimmery paper I pick up by the truckload at Hobby Lobby. It's just 8 1/2 x 11 paper they carry with their solid cardstock, this stuff cuts like a dream for me! The solid layer of the dress is also this same paper, just a slightly different shade, and glittered by me. Of course I had to add rhinestones and pearls to the dress. The base of this card is heavy weight shimmery cardstock from Couture Cardstock, the shape is from Elegant Edges, I just welded two of the identical shapes together to make the card. The white frame is my Hobby Lobby paper, glittered again. I've got to say I'm very pleased at how the lace dress turned out, I'll be doing this again!

I hope you all have a very blessed week!


Wednesday, April 20, 2011

Sweet Mini-Book for my Sweet Goddaughter!

Here is my second mini-book.....I have to say, these are addicting! Connie has been such an inspiration, sharing her ideas and techniques, and of course her passion! So, without further ado....

Here is the cover. I made this for my sweet little goddaughter, Kenna Grace. As you will soon see, she is a treasure!
This is the first layout. Look at those tiny little feet! On the journaling box, I wrote out Psalm 139:13-16, one of my favorite passages!
Sweet! This is my cousin, his wife, and baby Kenna. They really are such a sweet family! I love how the pocket turned out on this one!
What a sweet baby! Don't you just want to snuggle her?! I love this page. I was having a hard time coming up with a way to fit the poem that I wanted on the page in a way that looked nice on the layout. I came up with the idea for the daisy pocket and putting the tag in at an angle worked much better. It ended up being one of my favorite pages.
Here's a closer look at the daisy pocket.
I put the clothesline in for Connie! I think it turned out sweet!
If she isn't precious, I don't know what is!!!
Isn't she adorable?!
Here is the final page. And she is Cute as a Button! This book was SO fun to make!
And this is the back cover. All the paper I used is from K&Company. I used cuts from Kate's ABC's, Paisley, Elegant Edges, and Sentimentals. Thanks for letting me share my book! I hope you like it!


Sunday, April 3, 2011

I'm in love....

with the new Elegant Edges cartridge!!!! I received this cart in the mail on Friday and I'm addicted already! Here was my first project with it...
I used the bird on her perch from the April Showers seasonal cart and welded the So Tweet to it from the Gypsy Font. The scalloped mat is from Elegant Edges.  Amazing what you can design while waiting for an oil change!
Here's the inside, I just had to layer all these papers! I also added some seam binding ribbon I colored with my alcohol inks.

This is one of the beautiful lace/eyelet frames from Elegant Edges as well. I was so giddy as this was cutting! And let me tell you everything I've cut from this cart has been perfect so far!
And finally this eyelet frame as well. I am seriously thinking about just cutting each frame on this cart out just so I can admire them! I have been waiting and hoping for a cart that cuts borders, frames and mats like this for a long time....so thrilled it's here!
The two pictures above are on the layout with the little girl and kitty I showed you a few weeks ago, click here if you want to see it.

Hope you have a very blessed day!